Gnocchi alla Sorrentina
Part 1: Making the Gnocchi
This recipe will give you enough gnocchi for a tray of 4 portions. In addition, you will have extra gnocchi you can freeze and use for another meal.
What you need:
6 medium potatoes, yellow or white (should weigh 2.2lbs),
1 cup all purpose flour (in Italy we use 00),
1 room temperature egg,
- Start by washing the potatoes to take off any dirt.
- Peel the potatoes (the italian recipe says it is better to boil them and then peel them after they are boiled when they are very hot....my husband said this was very difficult without burning your hands. If you are brave you can peel them after you boil them..personally I don't think there is much of a difference in taste to peel before)
- Put the potatoes in a pot with cold water and put your timer on for 35 minutes. Then drain the water.
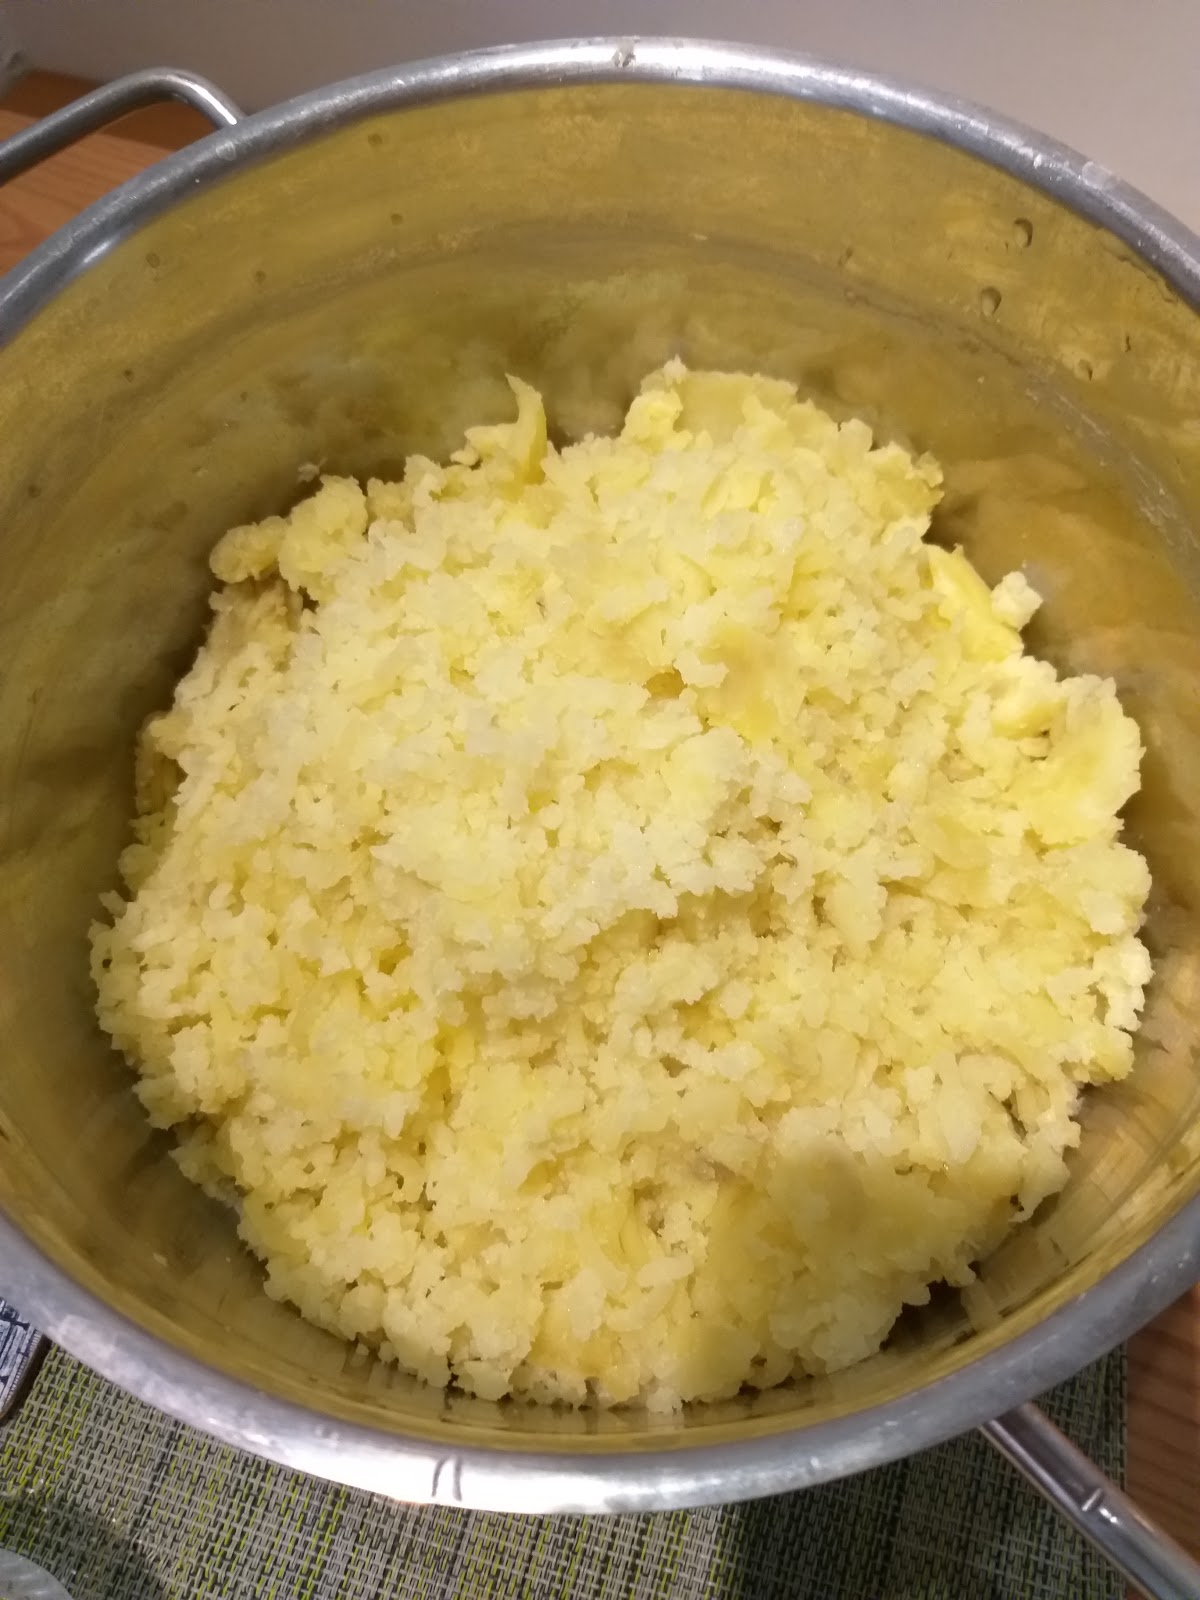
- After, the italian way is to use one of these potato mashers. If you don't have one you can use a mixer to make sure the potatoes are smooth without lumps. Our potatoes looked like this after using the italian masher- they were smooth without lumps.
- Next step is to pour your flour on a clean work surface. Put the warm potatoes in the center.
After you have mashed together the potatoes and flour by hand, add an egg in the middle.
Mix this all together with your hands until the mixture is smooth (you are not kneading like when you make other kinds of pasta.) Mix until it is homogeneous like below (should take 2-3 minutes).
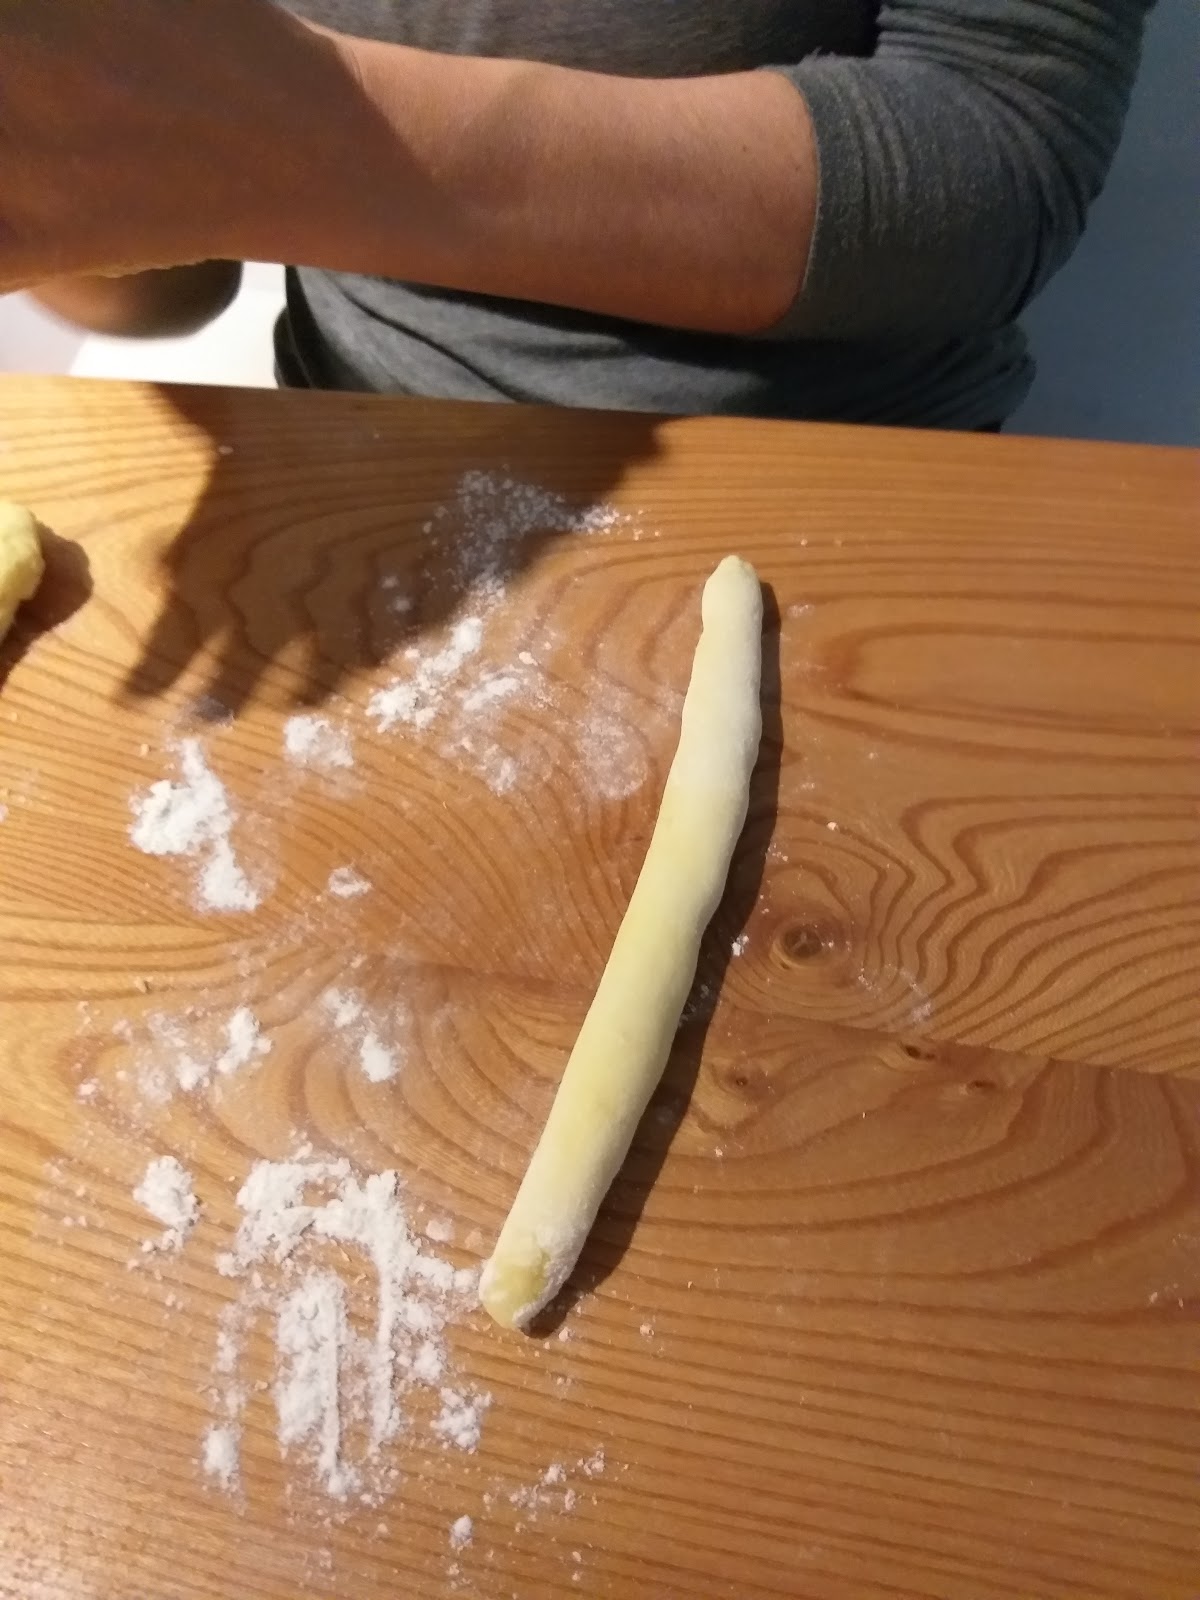
Cut a slice of the dough (it will still be soft and a little warm from the warm potatoes).
You need extra flour on the table for the next step, which is rolling and cutting the gnocchi.
With flour on your knife, begin to make 2-3 cm gnocchi size "little pillows". If you are doing this with someone else, they can cut while you continue to make the long rolled strips of dough. If not, make all your long strips first and then cut into little pieces.
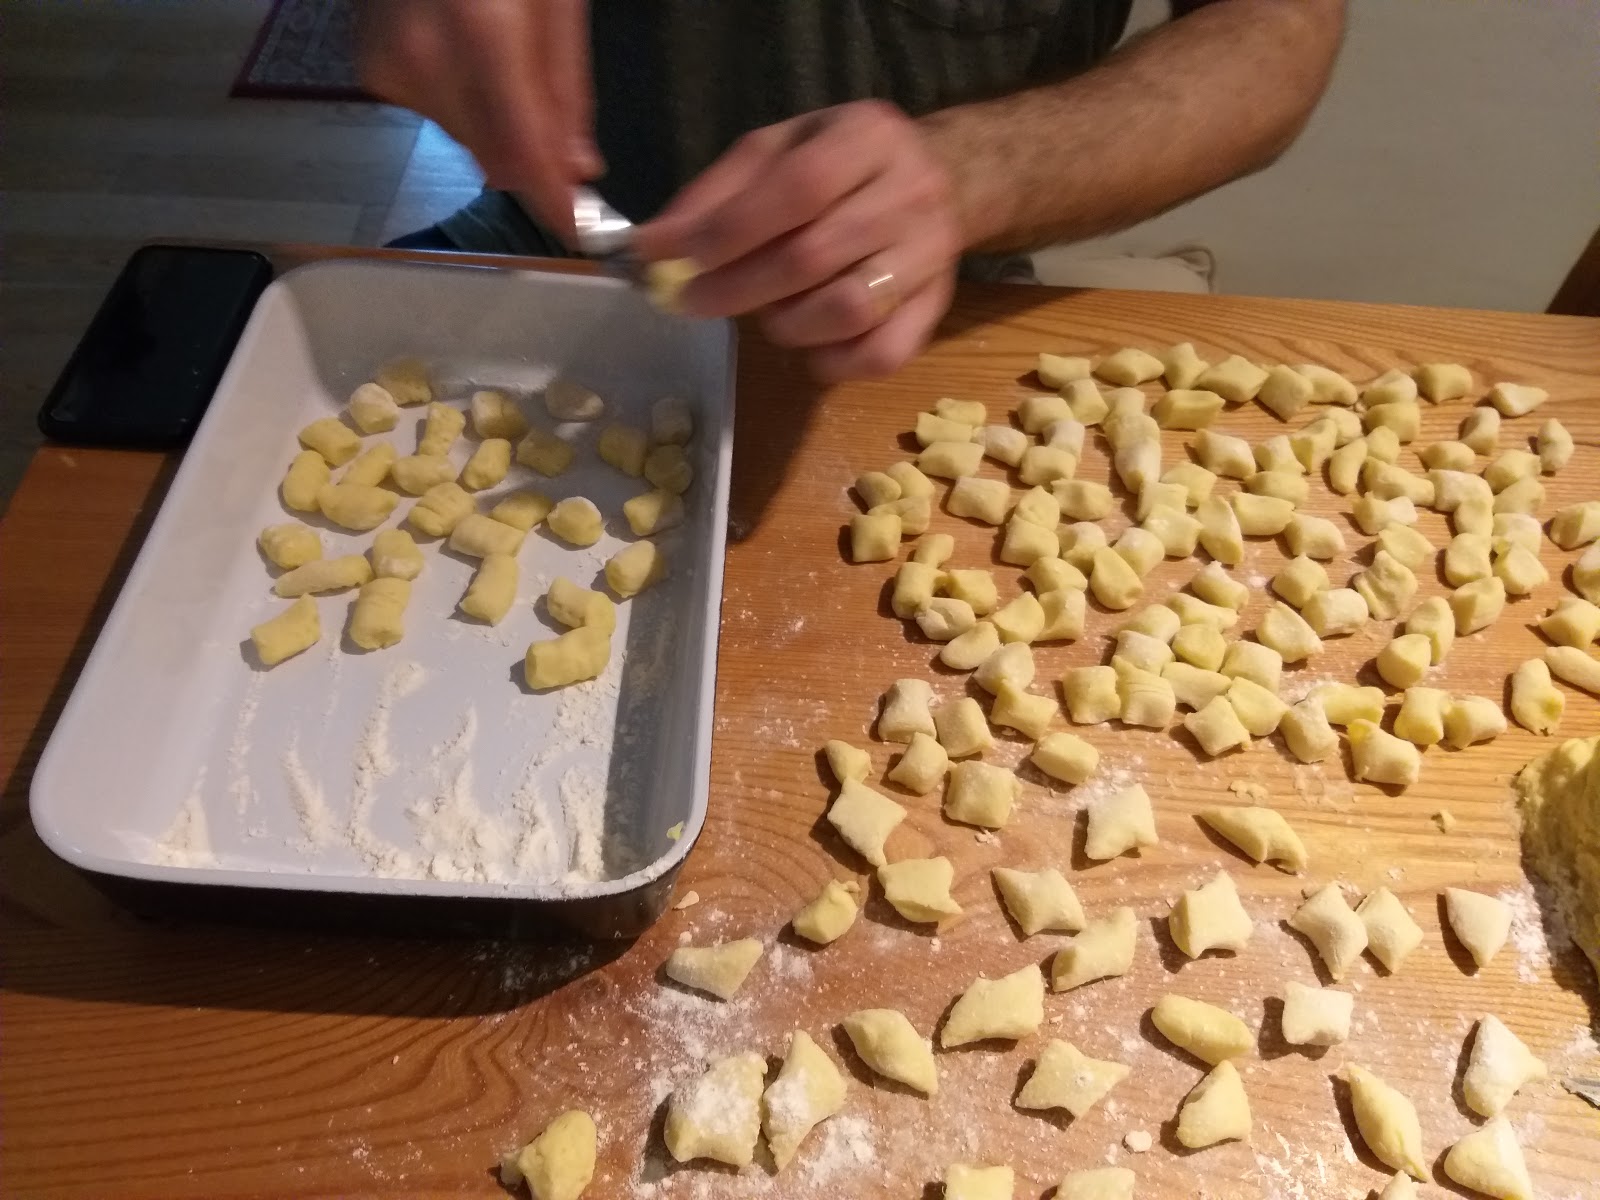
Using a fork, you will role each gnocchi "pillow" gently on the top of the fork with a finger to create a classic gnocchi shape. Put the finished gnocchi on a flour coated tray without them touching each other. Cover the gnocchi with a towel to prevent them from drying out. Continue this until you finish all the dough. (this will probably take you 1-2 hours)
Part 2: Make the marinara sauce and boil/bake gnocchi
What you need:
-Jar of tomato puree
-two garlic cloves
-basil
-mozzarella
-grated parmigiana cheese
- To make the marinara sauce, lightly saute two garlic cloves in olive oil. Add the tomato puree or crushed tomatoes (depending on what you like best). Add salt and pepper. Put a lid on, stir occasionally, and it will be ready in 20 minutes.
2. In another pot, boil water that you will use to cook the gnocchi. Once the water is boiling, add a few pinches of salt. Slightly turn your burner down so that the water is not boiling too much. You should see small bubbles. Pour in the gnocchi. Wait for the gnocchi to rise. When they rise, it means they are done and you can put them into a separate tray.
3. As you are boiling your gnocchi and removing them, your marinara sauce will be ready and you can start pouring in some of the sauce.
4. Once you have a layer of gnocchi and tomato sauce on the bottom of your tray, you can add a layer of mozzarella (diced in small pieces) and parmigiana cheese. Then you will do another identical layer of gnocchi, sauce, mozzarella, parmigiana cheese.
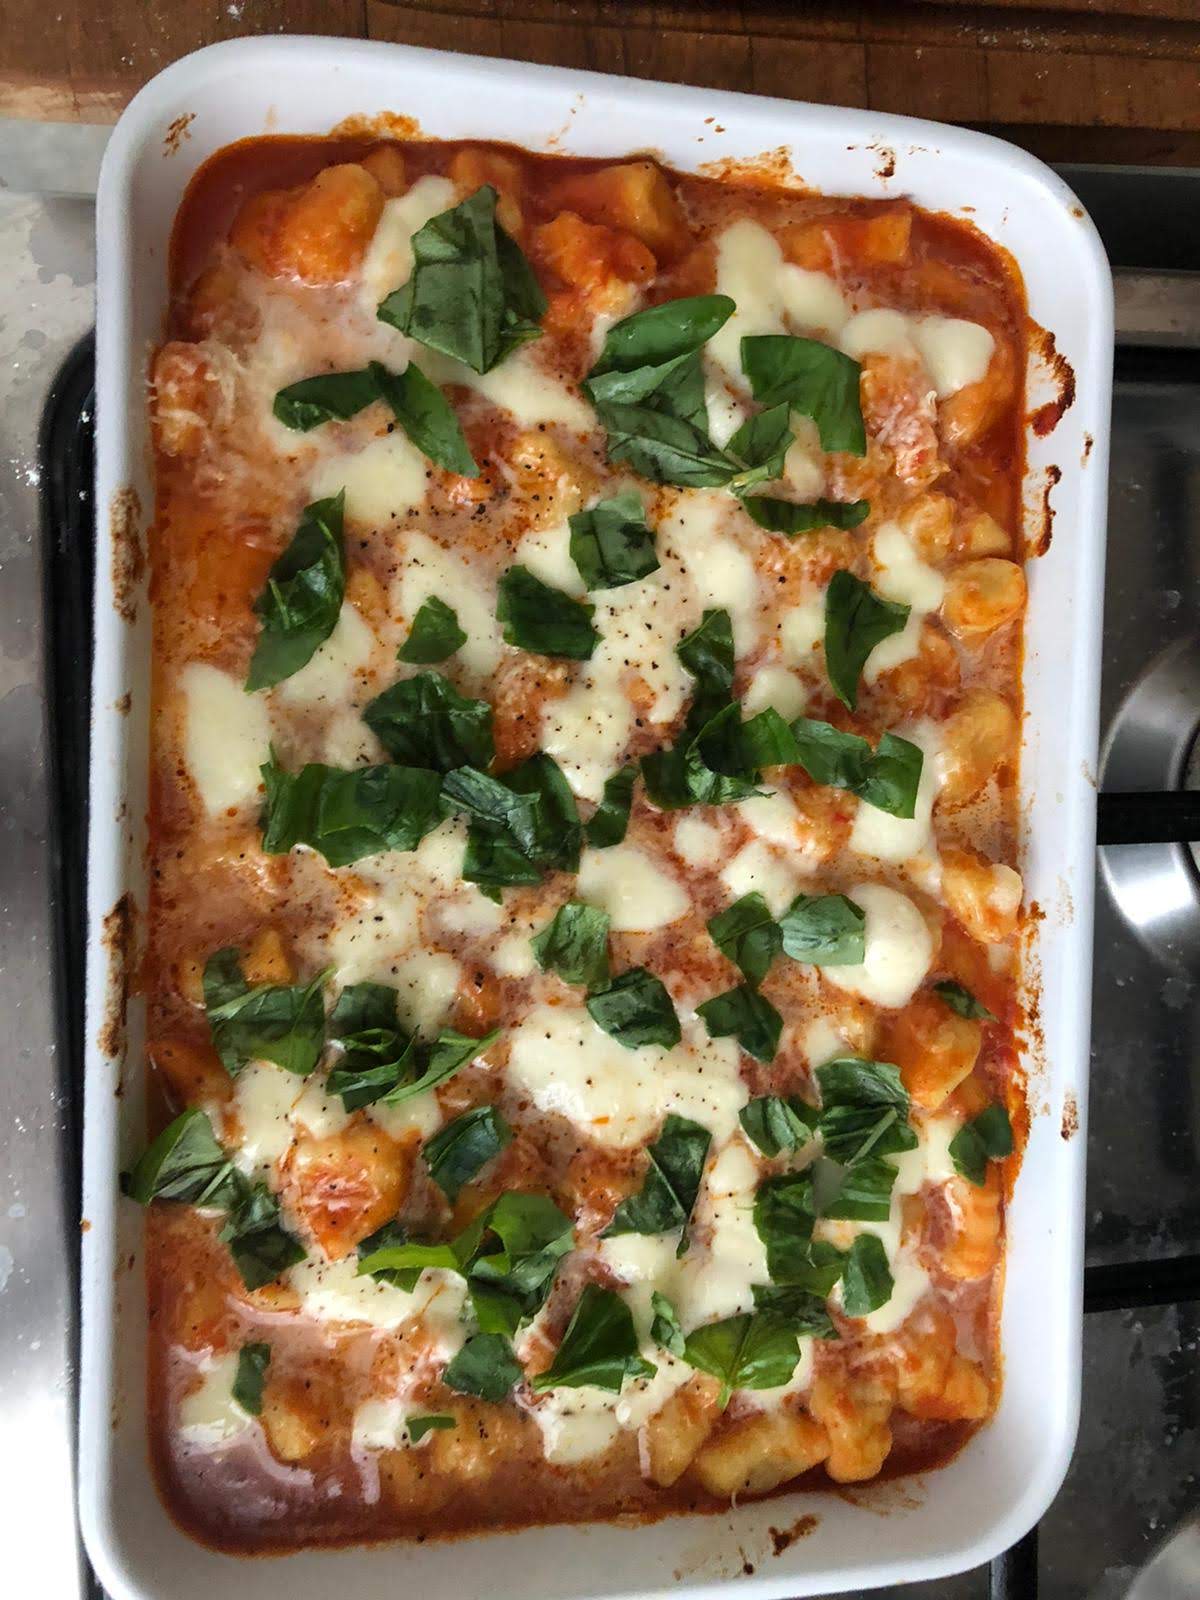
5. When you have finished adding all the cooked gnocchi, sauce, and cheese you are ready to put it in the oven. Put the tray in a precooked oven (475 F). Keep your tray in the oven for 5 minutes. When you take it out, add the fresh basil on top.
Serve your gnocchi hot and enjoy! Buon Appetito!!!
Part 3: Freeze your leftover gnocchi
Freeze the extra gnocchi you have. You most likely did not need to add them all to your tray, but it depends on how many people you served and how large your tray is. Put your tray with the extra gnocchi in the freezer for 20-30 minutes. Then, transfer the frozen gnocchi into a bag and store in the freezer. For your next meal, you do not even need to defrost the gnocchi. You can put them directly into boiling water. When they rise to the top, they are done!